This post is all about a little DIY fun. For those of you that are new here, welcome! My name is Jackie. I’m a former Morning Show Host for Morning Live First Edition (Canada’s Earliest Morning show), DIY Guru for Morning Live on CHCH and a recent host for the Shopping Channel in Canada. You can still find me hosting Tiny Talent Time with Jason Agnew on CHCH News.

I’ve always had a passion for DIY Projects. If you look back at some of my MUCH older blog posts you’ll learn that very quickly. With that said, my heart was ready to explode when I planned to refinish my grandmother’s dressers. I was very close to my grandfather as a child and these dressers really meant so much to me. I was thrilled that we would be able to use them in our new home and I was thrilled that I could get my hands on some paint.
For this project I’ve partnered up with Annie Sloan. I thought long and hard about which colour I would paint my dressers and how I would refinish them. I mean… have you seen all of the colours there are to choose from!? Paris Grey and French Linen were my immediate go tos. I scoured Pinterest searching both colours (Anyone else do this too? Just me?) to see what other people had come up with. After figuring out my colour scheme for my Master Bedroom I quickly changed my mind and decided that I would bring some colour to the room with pillows and throws and leave the dressers as a blank canvas. With that in mind, I chose the colour pure.
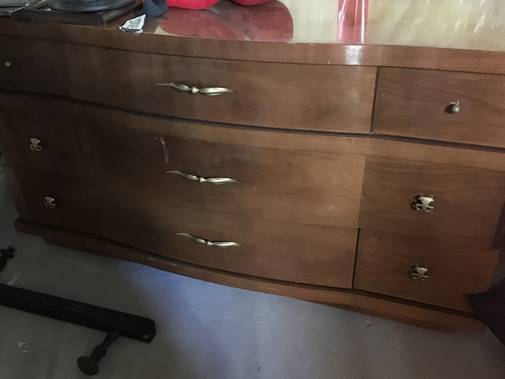
Curious as to what these dressers look like? Take a look at the before. Extremely solid and sturdy… a little musky but I knew the paint would help with that and they have such great hardware. Of course, if you were to paint these you’d have to sand them down first but with Annie Sloan’s chalk paint you just get right to the fun part.
So after the chalk paint dried I was able to add my wax. Ryan helped me cover all surfaces with the clear wax from Annie Sloan. This really helps to cure the paint and it dries almost instantly. It’s also necessary if you’re looking to add some dark wax to antique your piece. I started adding the dark wax in the corners and on the edges. It was a bit nerve wracking because it goes on quite dark (hence the name lol). Let me show you how it looked once all of the dark wax was on.

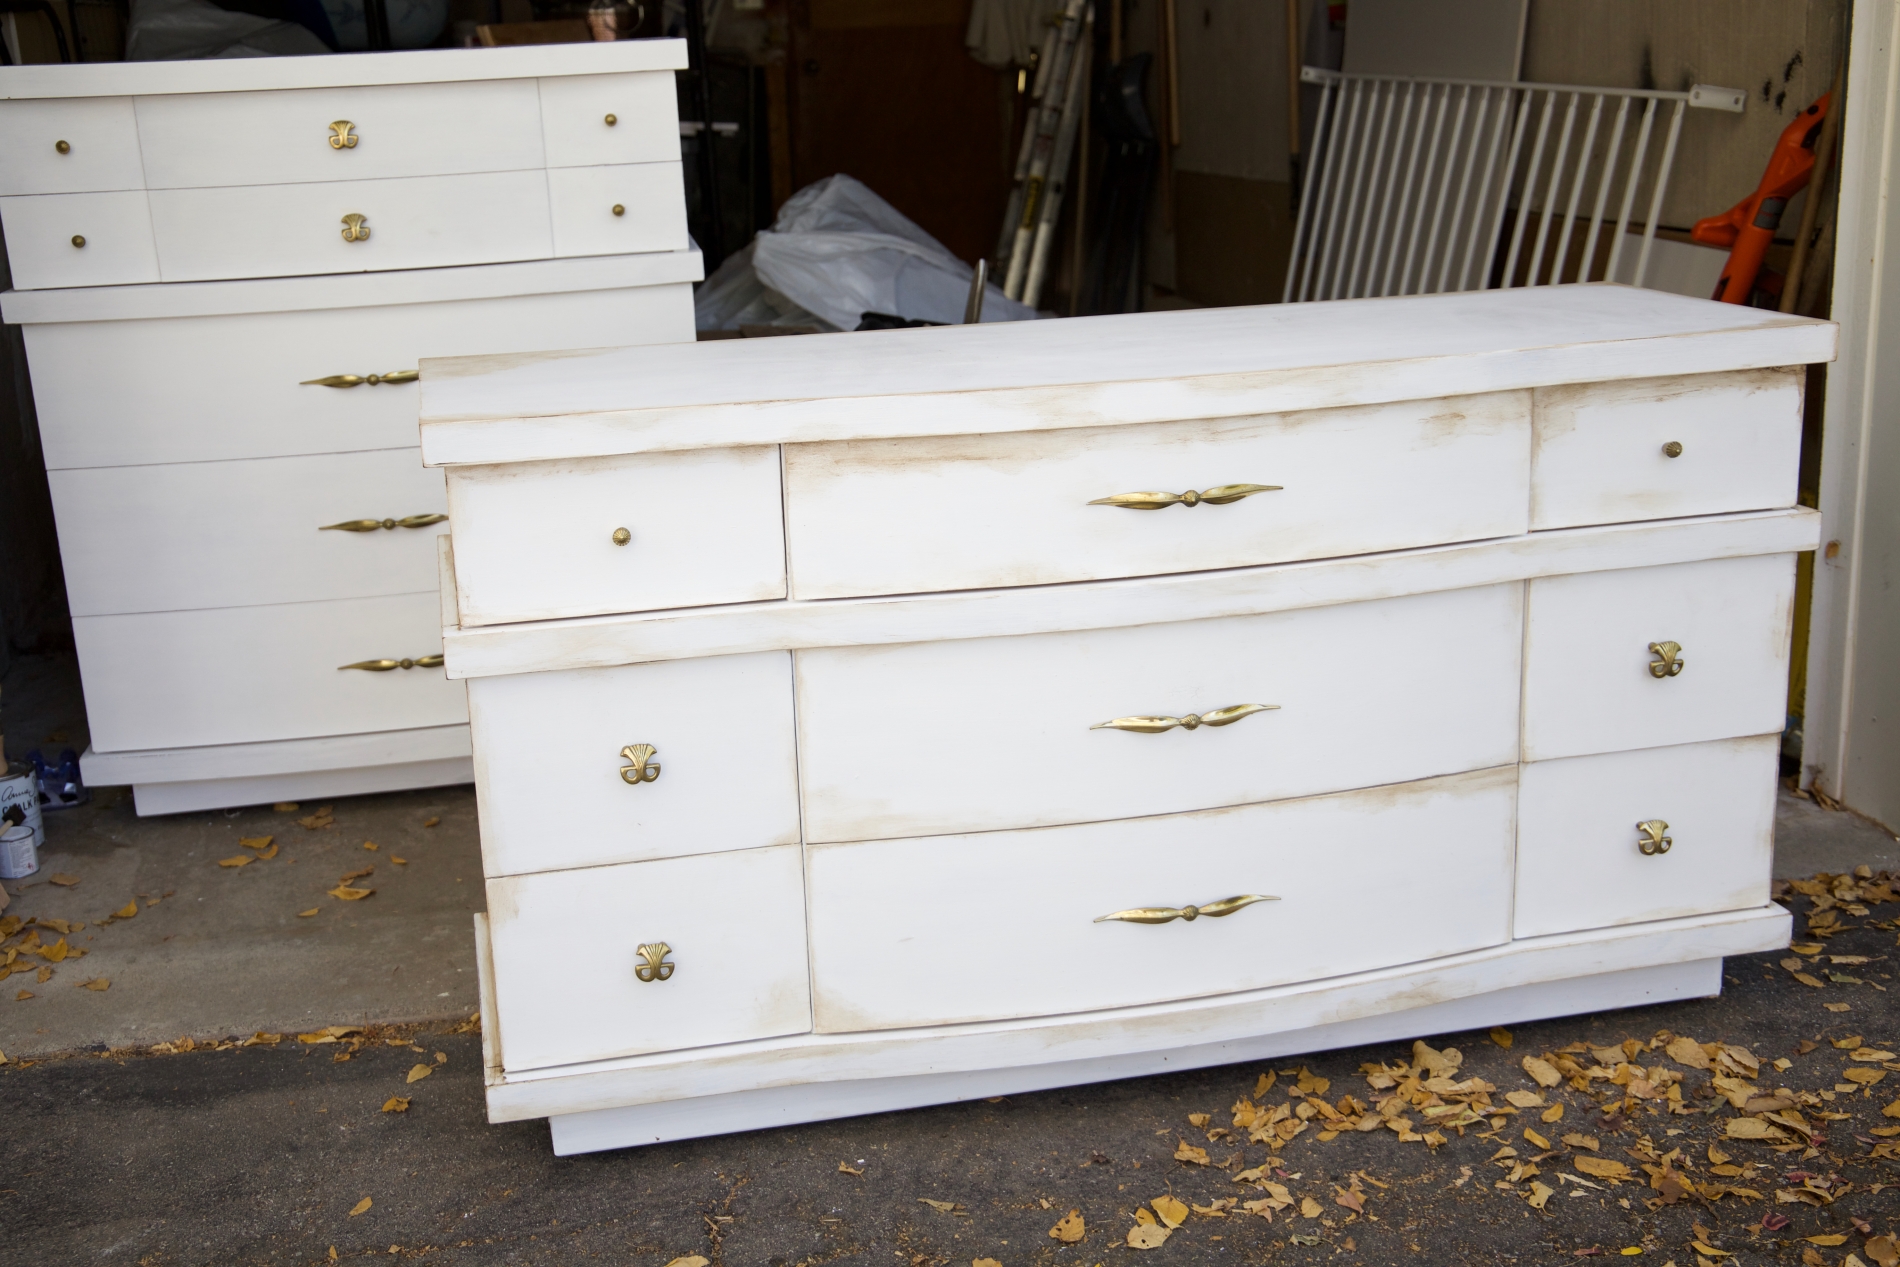
See how dark that looks!? I was freaking out inside a little bit until I grabbed a clean rag, applied a bit of clear wax and really rubbed the dark wax into the paint. WHAT A DIFFERENCE! I am telling you… it really made these dressers look incredible. The pictures don’t do them justice.
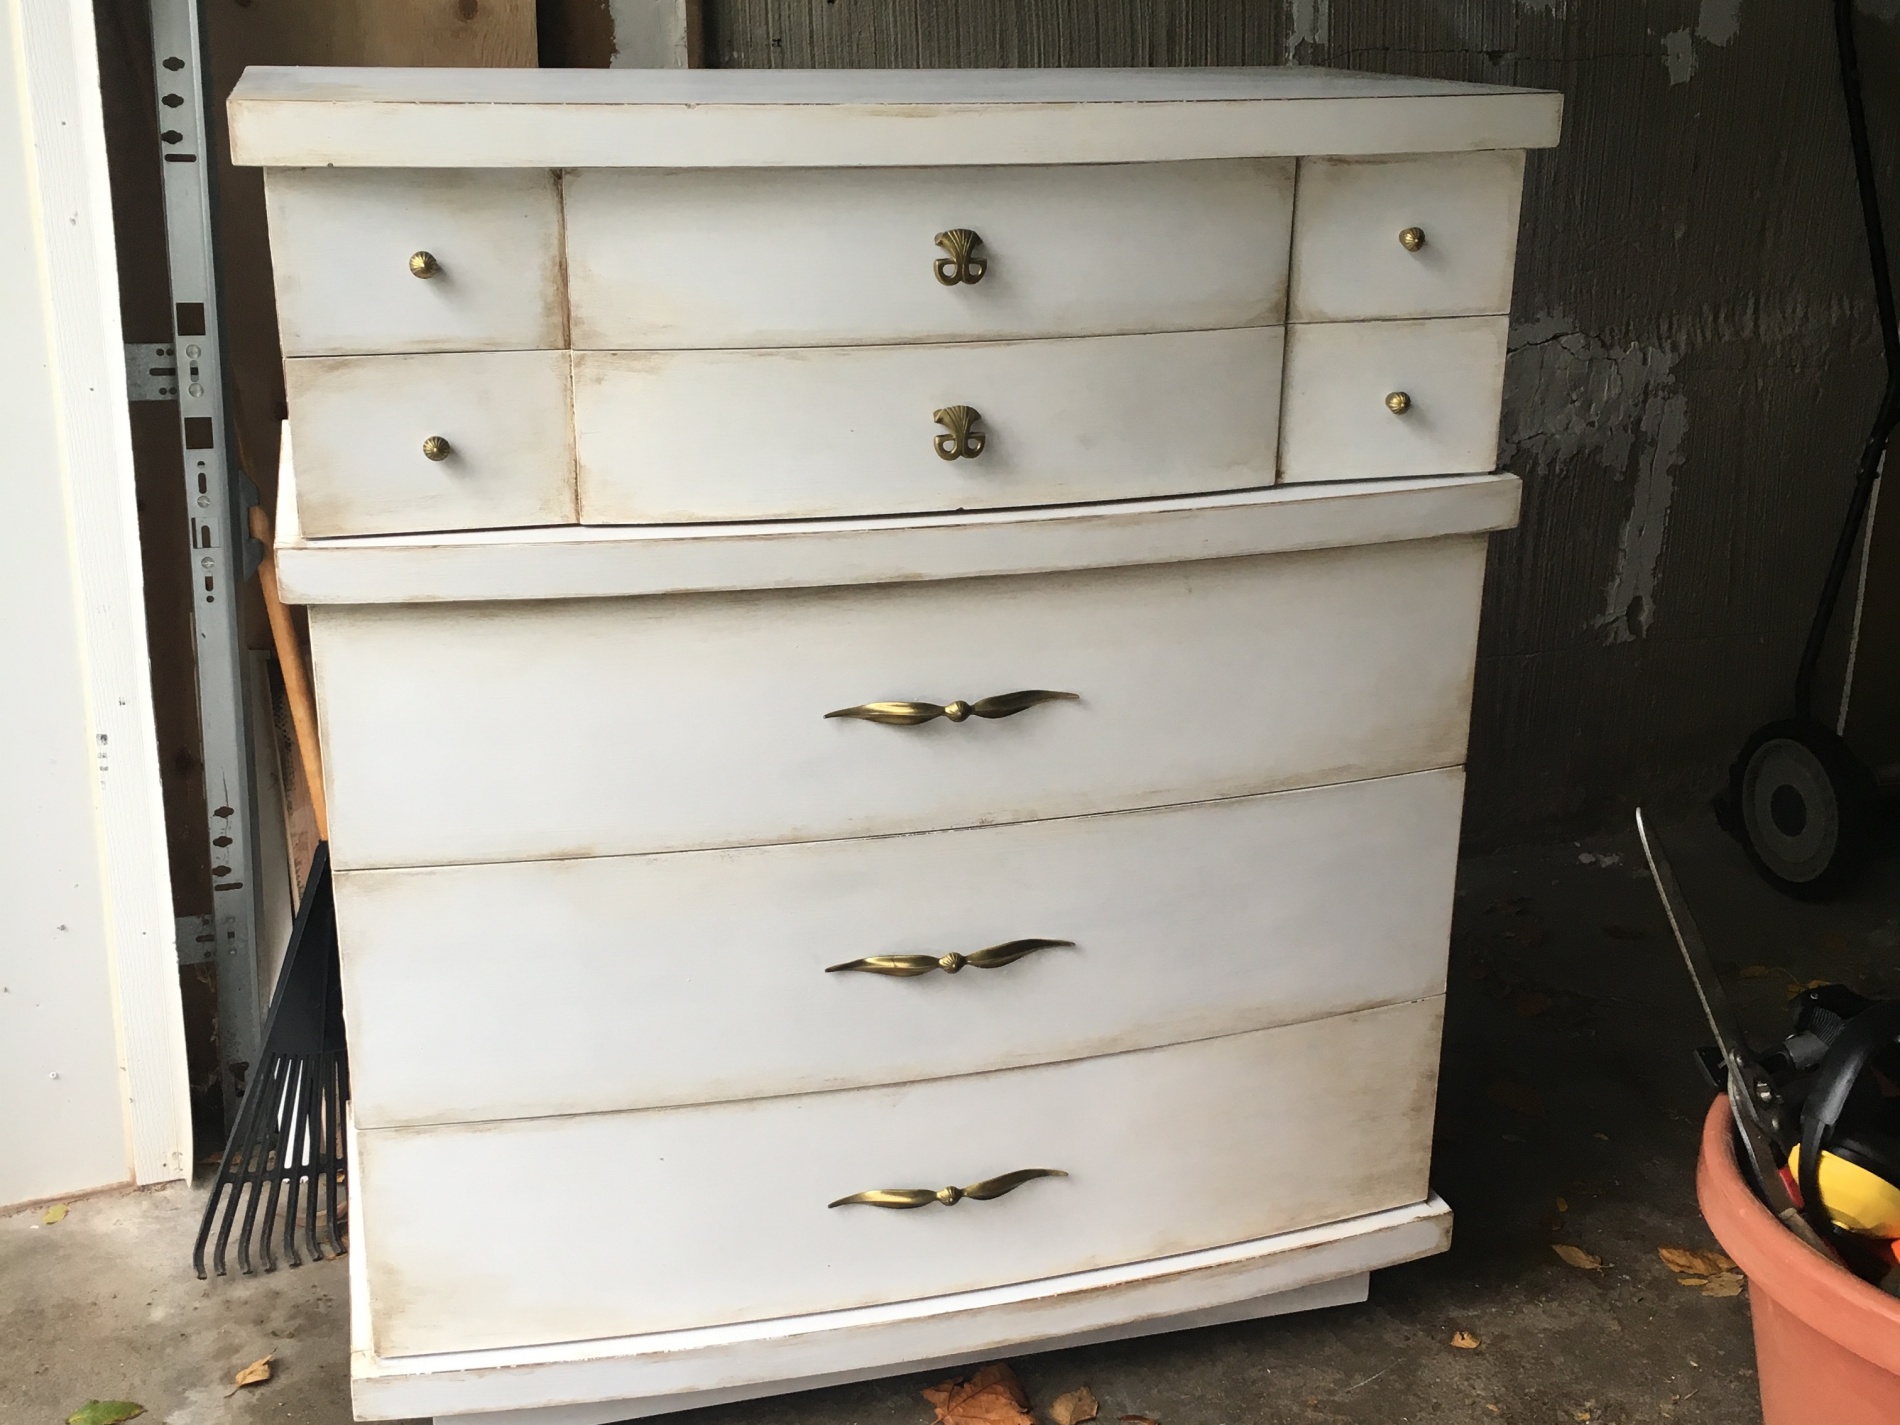
Doesn’t it look so much more natural after you rub the wax into the paint? It really helps to move the wax around when you use the clear wax on your rag. ***TIP: Don’t mix your clear and dark wax. You can use a spoon or a knife to help you scoop some of the clear wax out. You don’t want to get the dark wax in your clear wax can.
Can’t wait for you to see these beauties styled in our Master Bedroom Makeover. Only a few more weeks till the reveal!
Check back next week for my next One Room Challenge post! Be sure to click the link to see all the other bloggers participating in the challenge.
Jackie xo
 To check out the other bloggers and their projects be sure to visit the link-up pate HERE. And, you won’t want to miss the 20 featured bloggers HERE.
Trackbacks
-
-
[…] 1, Week 2, Week 3, Week […]
-
[…] forgot to mention that I also refinished my grannie’s dressers. You’ll find that in week 3‘s post. I think I was 37 weeks pregnant at the time. Am I crazy or what? We are seriously in […]


[…] some progress. Next up… art and accessories! Don’t forget the dressers I refinished in week three. They look AMAZING in the space. Can’t wait to show you over the next few […]